Scripting LanguageUnit 414 min read
JavaScript DOM Manipulation & Events: Selectors, Traversal, Events, and Dynamic Updates
Unit 4 of Scripting Language covers how JavaScript interacts with the Document Object Model (DOM) to dynamically update web pages, handle user events (clicks, keypresses), and traverse/modify the DOM tree. Learn selectors, event models, DOM manipulation methods, and real-world use cases like form validation and interac
TAKEAWAYS:
- The DOM is a tree-like structure representing HTML elements; JavaScript can select, traverse, and modify nodes dynamically.
- Event handling uses
addEventListener(),onclick, or inline handlers to respond to user actions (e.g., clicks, form submissions). - DOM methods like
getElementById(),querySelector(), andinnerHTMLenable real-time updates without page reloads. - jQuery simplifies DOM manipulation with chained selectors (e.g.,
$("#id").hide()), but vanilla JS is lighter and faster. - Common pitfalls: Forgetting to attach event listeners after DOM loads, or using
innerHTMLunsafely (XSS risks). - Exam focus: Write code for dynamic form handling, event-driven interactions, and DOM traversal (e.g., "Change text on button click").
1. The Document Object Model (DOM): Structure and Basics
The DOM is a tree-like representation of an HTML document, where each node is an object (e.g., <div>, <p>, <button>). JavaScript can:
- Select nodes (e.g.,
document.querySelector()). - Traverse up/down the tree (e.g.,
parentNode,children). - Modify content, styles, or attributes (e.g.,
innerHTML,classList).
How the DOM Tree Looks
graph TD
    A["document"] --> B["<html>"]
    B --> C["<head>"]
    B --> D["<body>"]
    D --> E["<div id='container'>"]
    E --> F["<p class='greeting'>Hello</p>"]
    E --> G["<button>Click</button>"]
Key Properties of DOM Nodes:
| Property | Description | Example |
|---|---|---|
nodeType |
Type of node (1=element, 3=text) | E.nodeType → 1 |
nodeValue |
Text content of a node | F.nodeValue → "Hello" |
childNodes |
Array of child nodes | E.childNodes → [F, G] |
parentNode |
Parent of the node | F.parentNode → E |
attributes |
Collection of attributes | G.attributes.id → "btn" |
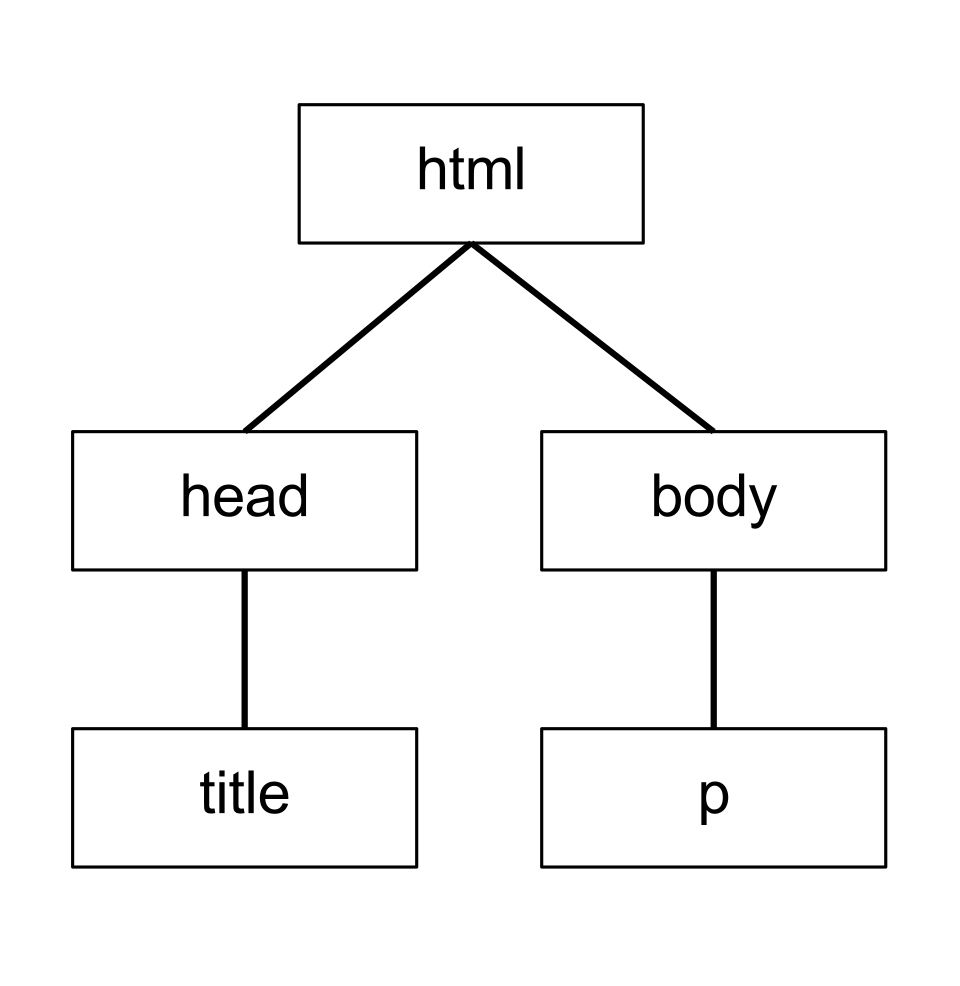 A labelled tree showing how `<html>`, `<body>`, and nested elements form a hierarchy. (Image: Lubaochuan, CC BY-SA 4.0, via Wikimedia Commons)
Selecting DOM Elements
| Method | Description | Example |
|---|---|---|
getElementById("id") |
Selects one element by ID | document.getElementById("header") |
querySelector(".class") |
Selects first matching element | document.querySelector("p.error") |
querySelectorAll() |
Returns NodeList of all matches | document.querySelectorAll("div") |
getElementsByClassName() |
Returns HTMLCollection | document.getElementsByClassName("btn") |
Worked Example: Selecting and Updating Text
<p id="demo">Original text</p>
<button onclick="changeText()">Click Me</button>

<script>
function changeText() {
  const p = document.getElementById("demo");
  p.textContent = "Text changed via JS!";
  p.style.color = "red";
}
</script>
State After Click:
graph TD
    A["<p id='demo'>"] --> B["Text changed via JS!"]
    A --> C["style.color: red"]
2. DOM Manipulation: Changing Content and Styles
Use these methods to dynamically update the DOM:
| Method | Purpose | Example |
|---|---|---|
innerHTML |
Set/get HTML content | div.innerHTML = "<b>Bold</b>" |
textContent |
Set/get text (safer than innerHTML) |
p.textContent = "Hello" |
setAttribute() |
Add/modify attributes | img.setAttribute("src", "new.jpg") |
classList.add() |
Add a CSS class | btn.classList.add("active") |
style.property |
Inline style changes | div.style.background = "blue" |
⚠️ Security Note:
- Never use
innerHTMLwith user input (risk of XSS attacks). - Use
textContentfor safe text updates.
Worked Example: Dynamic Form Validation
Scenario: Validate a Khalti payment form where the user must enter a valid email and amount ≥ 100.
<form id="paymentForm">
  <input type="email" id="email" required>
  <input type="number" id="amount" min="100">
  <button type="submit">Pay</button>
  <p id="error"></p>
</form>

<script>
document.getElementById("paymentForm").addEventListener("submit", function(e) {
  e.preventDefault(); // Stop form submission
  const email = document.getElementById("email").value;
  const amount = parseInt(document.getElementById("amount").value);
  const errorEl = document.getElementById("error");

  if (!email.includes("@") || amount < 100) {
    errorEl.textContent = "Invalid email or amount must be ≥100!";
    errorEl.style.color = "red";
  } else {
    errorEl.textContent = "Payment processing...";
    errorEl.style.color = "green";
    // Simulate API call
    setTimeout(() => alert("Payment successful!"), 2000);
  }
});
</script>
State After Invalid Submission:
graph TD
    A["<p id='error'>"] --> B["Invalid email or amount must be ≥100!"]
    A --> C["style.color: red"]
3. Event Handling in JavaScript
Events are actions triggered by users or browsers (e.g., clicks, keypresses). JavaScript responds via event listeners.
Types of Events
| Event Type | Triggered By | Example |
|---|---|---|
click |
Mouse click | <button onclick="handleClick()"> |
submit |
Form submission | form.addEventListener("submit") |
keydown |
Keyboard press | document.addEventListener("keydown") |
mouseover |
Mouse enters an element | div.addEventListener("mouseover") |
load |
Page/image fully loaded | window.addEventListener("load") |
Ways to Handle Events
- Inline HTML Event Handlers (❌ Avoid in production):
<button onclick="alert('Clicked!')">Click</button> - DOM Property Handlers (❌ Legacy):
button.onclick = function() { alert("Clicked!"); }; addEventListener()(✅ Recommended):button.addEventListener("click", function() { console.log("Button clicked!"); });
Worked Example: Pathao Ride Request Button
<button id="requestRide">Request Ride</button>
<p id="status">Waiting...</p>

<script>
document.getElementById("requestRide").addEventListener("click", function() {
  const statusEl = document.getElementById("status");
  statusEl.textContent = "Finding nearest driver...";
  statusEl.style.color = "blue";

  // Simulate driver assignment
  setTimeout(() => {
    statusEl.textContent = "Driver assigned! ETA: 5 mins";
    statusEl.style.color = "green";
  }, 1500);
});
</script>
State After Click:
graph TD
    A["<p id='status'>"] --> B["Finding nearest driver..."]
    A --> C["style.color: blue"]
    D["After 1.5s"] --> E["Driver assigned! ETA: 5 mins"]
    E --> F["style.color: green"]
4. DOM Traversal: Navigating the Tree
Traverse the DOM to find parent/child/sibling nodes dynamically.
| Method | Description | Example |
|---|---|---|
parentNode |
Get parent node | child.parentNode |
children |
Get all child elements | parent.children |
firstChild/lastChild |
First/last child node | parent.firstChild |
nextSibling/previousSibling |
Adjacent siblings | node.nextSibling |
closest(".selector") |
Find nearest ancestor matching selector | node.closest("form") |
Worked Example: NTC Traffic Light Controller
Scenario: A traffic light system where clicking a button cycles through red → yellow → green.
<div id="trafficLight">
  <div class="light red active"></div>
  <div class="light yellow"></div>
  <div class="light green"></div>
</div>
<button id="changeLight">Next Light</button>

<script>
const lights = document.querySelectorAll(".light");
let currentIndex = 0;

document.getElementById("changeLight").addEventListener("click", function() {
  lights[currentIndex].classList.remove("active");
  currentIndex = (currentIndex + 1) % lights.length;
  lights[currentIndex].classList.add("active");
});
</script>
State After Each Click:
- Initial State:
graph TD A["<div class='light red active'>"] --> B["Active"] C["<div class='light yellow'>"] --> D["Inactive"] E["<div class='light green'>"] --> F["Inactive"] - After 1st Click (Yellow Active):
graph TD A["<div class='light red'>"] --> B["Inactive"] C["<div class='light yellow active'>"] --> D["Active"] E["<div class='light green'>"] --> F["Inactive"] - After 2nd Click (Green Active):
graph TD
    A["<div class='light red'>"] --> B["Inactive"]
    C["<div class='light yellow'>"] --> D["Inactive"]
    E["<div class='light green active'>"] --> F["Active"]
5. jQuery vs. Vanilla JavaScript
| Feature | jQuery | Vanilla JavaScript |
|---|---|---|
| Syntax | Concise, chained methods | Verbose, longer code |
| Performance | Slower (library overhead) | Faster (native) |
| Browser Support | Works on older browsers | Modern browsers only |
| Learning Curve | Easier for beginners | Steeper (requires DOM API knowledge) |
| Example | $("#id").hide() |
document.getElementById("id").style.display = "none" |
When to Use jQuery:
- Legacy projects.
- Rapid prototyping.
- Cross-browser compatibility needs.
When to Use Vanilla JS:
- Modern SPAs (React, Vue).
- Performance-critical apps.
- TU/PU exams (preferred for full marks).
6. Common Exam Questions & Solutions
Q1: Create a form with validation (like the BCA entrance exam question).
<form id="bcaForm">
  <label>Name:</label>
  <input type="text" id="name" required>
  <label>Email:</label>
  <input type="email" id="email" required>
  <label>Mobile:</label>
  <input type="tel" id="mobile" pattern="[0-9]{10}">
  <button type="submit">Submit</button>
  <div id="result"></div>
</form>

<script>
document.getElementById("bcaForm").addEventListener("submit", function(e) {
  e.preventDefault();
  const name = document.getElementById("name").value;
  const email = document.getElementById("email").value;
  const mobile = document.getElementById("mobile").value;
  const resultEl = document.getElementById("result");

  if (name && email.includes("@") && mobile.length === 10) {
    resultEl.innerHTML = `
      <h3>Submission Successful!</h3>
      <p><strong>Name:</strong> ${name}</p>
      <p><strong>Email:</strong> ${email}</p>
      <p><strong>Mobile:</strong> ${mobile}</p>
    `;
  } else {
    resultEl.textContent = "Invalid input! Check fields.";
    resultEl.style.color = "red";
  }
});
</script>
Q2: Explain event handling with an example.
Answer:
An event is an action (e.g., click, submit) that triggers a function. JavaScript handles events via:
- Inline handlers (e.g.,
<button onclick="func()">). - DOM properties (e.g.,
button.onclick = func). addEventListener()(best practice):button.addEventListener("click", function() { console.log("Button clicked!"); });
Example: A Daraz "Add to Cart" button:
document.querySelector(".add-to-cart").addEventListener("click", function() {
  const cartCount = document.getElementById("cart-count");
  const currentCount = parseInt(cartCount.textContent) || 0;
  cartCount.textContent = currentCount + 1;
});
In the Real World
eSewa Payment Gateway
- Idea Used: Event-driven form validation and DOM updates.
- How: When a user enters a Ncell mobile number and clicks "Pay," JavaScript validates the input (10 digits) and dynamically updates the payment button state (disabled/enabled). If valid, it triggers a
fetch()API call to process the payment without page reload.
Pathao Ride Request
- Idea Used: DOM traversal and event listeners.
- How: The "Request Ride" button uses
addEventListener("click")to:- Change the button text to "Finding Driver..."
- Update the UI to show estimated time (via
setTimeout). - Traverse the DOM to highlight the driver’s location on a map (using
document.getElementById("map-container")).
NEPSE Stock Price Dashboard
- Idea Used: Dynamic DOM updates with
innerHTML. - How: The dashboard fetches real-time stock data (e.g., NEPSE index) via AJAX and updates the table:
fetch("https://api.nepse.com/prices") .then(response => response.json()) .then(data => { document.getElementById("stock-table").innerHTML = data.map(item => `<tr><td>${item.symbol}</td><td>${item.price}</td></tr>`).join(""); }); - Risk Mitigation: Uses
textContentfor user-generated content to avoid XSS.
- Idea Used: Dynamic DOM updates with
Exam Tip
- Always use
addEventListener()(not inlineonclick) for full marks. - Validate inputs before DOM updates (e.g., check
email.includes("@")). - Trace DOM changes step-by-step in exams (e.g., "After clicking, the
<p>text becomes..."). - For jQuery questions, show both jQuery and vanilla JS solutions (examiners prefer vanilla).
- Common pitfalls:
- Forgetting
e.preventDefault()in form submissions. - Using
innerHTMLwith user input (leads to XSS). - Attaching event listeners before the DOM loads (use
DOMContentLoaded).
- Forgetting
Final Checklist for Full Marks:
✅ Select elements using querySelector/getElementById.
✅ Modify DOM with textContent/innerHTML (choose safely).
✅ Handle events with addEventListener.
✅ Traverse DOM using parentNode/children.
✅ Validate inputs before updates.
✅ Write commented code in exams (e.g., // Update status to "Processing").
Based on the TU BCA syllabus for Scripting Language (CACS254), unit 4.
Discussion
Loading…